

A pressure transmitter is a two-part device: a sensing element that detects physical pressure, and a signal-conditioning circuit that converts that measurement into a standardized electrical output — most commonly a 4-20mA current signal. Unlike a basic pressure transducer that may output millivolts or variable voltage, a transmitter produces a current output that is immune to electromagnetic interference and can travel hundreds of meters without signal degradation.
Understanding the difference matters when you’re specifying instruments for a plant or selecting wiring topology for a new loop. The term “transducer” is often used interchangeably in the field, but technically a pressure transducer outputs mV or voltage, while a pressure transmitter outputs a current (typically 4-20mA). Knowing which device you have determines which wiring method applies.
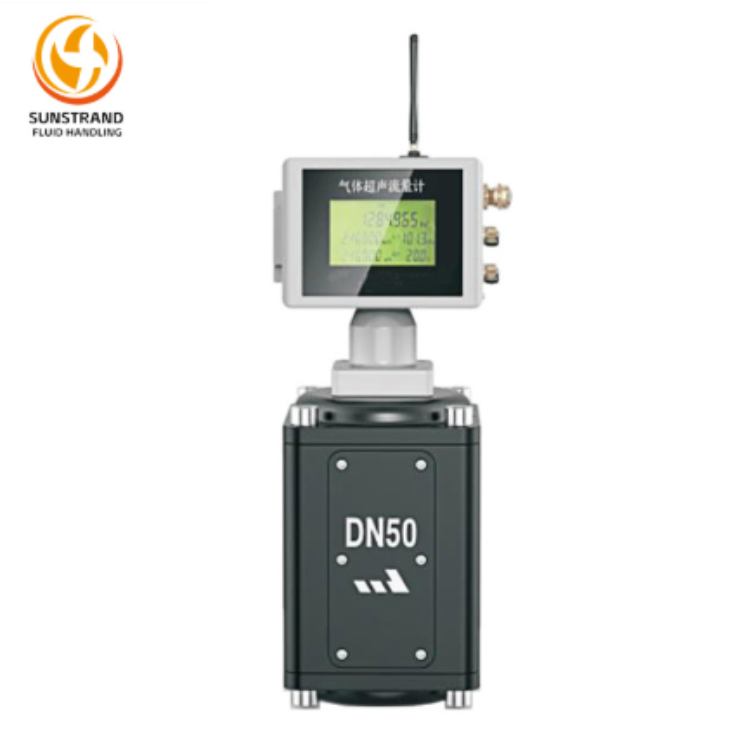
Sunstrand manufactures both gauge pressure and differential pressure transmitters designed for demanding industrial environments, with standardized 4-20mA outputs compatible with all major PLC and DCS platforms.
The 4-20mA current loop has been the dominant signal standard in industrial instrumentation for decades — and for good reason:
| Advantage | Why It Matters in the Field |
|---|---|
| Noise immunity | Current signals resist EMI from high-voltage lines and variable-frequency drives — critical in refineries and chemical plants |
| Live zero (4mA) | A 0mA reading instantly flags a broken wire or power failure — saves hours of fault diagnosis |
| Long-distance transmission | Current loops can drive signals hundreds of meters without the voltage drop that degrades mV signals |
| Multi-drop capability | Multiple instruments can be wired in series in the same loop — one power supply, many readouts |
| Universal compatibility | Accepted by virtually all PLC, DCS, and SCADA analog input cards without adapters |
The standard maps 4mA to the low-end of the process range (e.g., 0 bar) and 20mA to the high-end (e.g., 10 bar). This pressure transmitter signal wiring convention is why correct loop wiring directly determines measurement accuracy.
Before diving into step-by-step instructions on how to wire a pressure transmitter, it’s important to understand which configuration your device uses. The number of wires determines everything: power supply sizing, cable routing, grounding strategy, and which PLC input card terminal you land on.
| 2-Wire | 3-Wire | 4-Wire | |
|---|---|---|---|
| Power source | Loop-powered (from signal loop) | Separate supply + shared GND | Fully separate supply |
| Signal wires | Same 2 wires as power | Dedicated 3rd wire | Dedicated 4th wire pair |
| Typical supply | 24V DC | 24V DC | 24V DC or 120/240V AC |
| Installation cost | Lowest | Medium | Highest |
| Ground loop risk | Low | Medium | Lowest (isolated) |
| Typical application | Most field transmitters | Transmitters with displays | Analyzers, high-power devices |
| HART compatible | Yes | Yes | Yes |
Most industrial pressure transmitters you’ll encounter on the plant floor use the 2-wire configuration. It’s the default for Sunstrand transmitters and nearly all major manufacturers because it minimizes cable cost while delivering a fully reliable 4-20mA output.
The 2-wire pressure transmitter wiring topology is the workhorse of process automation. Both power and signal travel on the same two conductors. The transmitter draws its operating energy directly from the loop — typically only 3.5–4mA — leaving the rest of the 4–20mA range for proportional measurement.
Step 1 — Identify terminals. On the transmitter, locate the “+” (positive, current IN) and “−” (negative, current OUT) terminals. On Sunstrand transmitters these are clearly labeled on the terminal block inside the housing cover.
Step 2 — Connect power supply positive. Run the positive conductor from the +24V DC power supply to the “+” terminal of the transmitter.
Step 3 — Connect signal wire to PLC input. Run a wire from the “−” terminal of the transmitter to the signal input (+IN terminal) of your PLC analog input card or panel meter.
Step 4 — Complete the loop return. Connect the −IN terminal of the PLC analog card back to the negative rail (−DC) of the 24V power supply. This closes the current loop.
Step 5 — Ground the shield. Ground the cable shield at one end only — preferably at the control panel/power supply end. Grounding both ends creates a ground loop that induces noise on the signal.

Key point: In single-ended PLC analog modules, multiple 2-wire transmitters can share one 24V DC power supply. Each transmitter’s “+” goes to the supply positive, and each “−” lands on its own dedicated channel input terminal. The supply negative is shared across all channel commons.
For a 2-wire transmitter on a multi-device loop, you must verify the power supply voltage is sufficient. Use Ohm’s law:
Example: Transmitter min. supply 12V, total loop resistance 500Ω → Vmin = (0.02 × 500) + 12 = 22V DC. A standard 24V DC supply provides adequate headroom.
4-wire pressure transmitter wiring completely separates the power circuit from the signal circuit. Two wires carry supply power to the transmitter’s internal electronics; two dedicated signal wires carry the 4-20mA output to the receiving instrument. This isolation eliminates ground loop issues and is preferred in environments with significant electrical noise, or when the transmitter incorporates complex electronics (displays, diagnostics, analytical functions).
Step 1 — Identify the four terminals. The terminal block will have two power terminals (L+ / L− or V+ / V−) and two signal terminals (I+ / I− or SIG+ / SIG−). Never mix these up — applying power to signal terminals can damage the input card.
Step 2 — Wire the power circuit. Connect the positive conductor from your supply (24V DC, or AC where specified) to L+. Connect the negative/neutral to L−. Consult the transmitter datasheet — some 4-wire models accept 85-265V AC.
Step 3 — Wire the signal circuit. Connect I+ to the +IN terminal of the PLC analog input channel. Connect I− to the −IN terminal (GND reference) of that channel.
Step 4 — Do NOT tie signal ground to power ground. In a 4-wire transmitter, the signal output is isolated. Bridging power common and signal common defeats the isolation and reintroduces ground loops.
Step 5 — Ground shields separately. Shield the power cable and signal cable separately. Ground each shield at the panel end only.

Choose 2-wire when: you need the lowest installed cost, your transmitter is a standard pressure/flow/level device, and loop resistance is within spec for your supply voltage.
Choose 4-wire when: the transmitter has high power consumption (analyzers, multivariable transmitters), your facility has severe electrical noise, the device requires AC power, or galvanic isolation between power and signal is a plant standard.
HART (Highway Addressable Remote Transducer) pressure transmitter wiring follows the same physical topology as standard 4-20mA wiring — HART is not a separate set of conductors. Instead, it superimposes a digital FSK (frequency-shift keying) signal at 1200 Hz on top of the 4-20mA analog loop. This means you can communicate digitally with a HART-enabled transmitter while the loop is live and still outputting the 4-20mA process value simultaneously.

HART-enabled Sunstrand transmitters support both analog 4-20mA output and bidirectional HART digital communication out of the box, allowing remote configuration, diagnostics, and calibration without disconnecting the loop.
Knowing how to connect a pressure transmitter to a PLC analog input correctly is where theory meets practice. PLC analog input modules typically operate in one of two modes:
For a typical installation connecting multiple pressure transmitter 4-20mA wiring to a single-ended analog input card:
Pre-commissioning checklist:
Use this interactive tool to verify your power supply is sufficient for your pressure transmitter loop before installation. Enter your loop parameters and get an instant minimum voltage recommendation.
Loop Voltage Calculator
Formula: Vmin = (0.020 × Rtotal) + Vtransmitter — based on maximum 20mA loop current.
| Mistake | Consequence | Fix |
|---|---|---|
| Shield grounded at both ends | 50/60Hz noise on signal, unstable readings | Cut/isolate shield at field end |
| PLC AI card set to voltage mode | Near-zero or pegged readings | Reconfigure AI channel to current (4-20mA) |
| Insufficient loop voltage | Transmitter saturates below 20mA | Use loop voltage calculator above |
| Signal cable in AC conduit | Inductive/capacitive interference, false readings | Reroute to instrument cable tray |
| Reversed polarity on 2-wire transmitter | No output or transmitter damage | Swap “+” and “−” conductors |
| Missing 250Ω for HART | HART communicator cannot connect | Add 250Ω resistor in series in loop |
Need a Pressure Transmitter That’s Easy to Wire?
Sunstrand’s 4-20mA transmitters come with clearly labeled terminals, pre-wired connector options, and full HART compatibility — designed to reduce installation time on the plant floor.
A 2-wire pressure transmitter uses just two conductors for both power and signal — the transmitter draws its operating power from the 4-20mA loop itself. A 4-wire pressure transmitter has two dedicated power wires and two dedicated signal wires, making the power supply and signal circuit completely independent. 2-wire is simpler and lower cost; 4-wire provides better isolation and suits high-power devices.
Most 4-20mA pressure transmitters require a 24V DC power supply, which is the industry standard for loop-powered instruments. Some 4-wire models accept 12V DC minimum or up to 36V DC, and certain 4-wire devices accept AC supplies (85–265V AC). Always check the transmitter datasheet for the exact supply voltage range. Use the loop voltage calculator above to confirm 24V provides adequate headroom for your total loop resistance.
This is correct behavior — 4mA represents the low-end of the measurement range (often 0 bar or 0 psi), not an error. A reading of 0mA, however, indicates a fault: open circuit, lost power supply, or a damaged transmitter. This “live zero” feature is a key advantage of 4-20mA signal wiring for diagnostics.
For a 2-wire transmitter in single-ended mode: connect the transmitter “+” to the +24V DC supply positive; connect the transmitter “−” to the +IN terminal of your PLC analog channel; connect the channel −IN/COM terminal to the supply negative. Configure the PLC channel for 4-20mA current input. See the detailed steps and diagram in Section 4 above.
Yes — a minimum of 250Ω must be present in the loop for HART communication to work. If your PLC analog input card has a low input impedance (below 250Ω), add a 250Ω resistor in series on the loop. Many HART-capable PLC cards already include the 250Ω burden resistor internally — check your card’s documentation before adding an external resistor.
Yes. Multiple 2-wire transmitters can share a single 24V DC power supply in a single-ended wiring configuration. The key constraint is current capacity: sum up the maximum current draw of all transmitters (each can draw up to 20mA at full scale) and ensure your power supply’s rated output current exceeds that total. Each transmitter still occupies its own dedicated analog input channel.
The most common causes are: (1) cable shield grounded at both ends — creating a ground loop; (2) signal cable routed alongside AC power or VFD cables; (3) loose terminal connections; (4) insufficient loop voltage causing the transmitter to operate outside its linear range. Work through the checklist in Section 7, starting with grounding verification.
Use shielded twisted-pair (STP) cable with a cross-section of 0.5–2.5mm² (AWG 24–14). The twisted pair reduces inductive interference pickup; the overall braid or foil shield blocks radiated EMI. For runs over 100 meters or in high-noise environments, consider individually shielded pairs (ISP) cable. Always ground the shield at the panel end only.
A pressure transmitter loop wiring diagram (also called an instrument loop drawing or ILD) shows the complete electrical path: power supply, transmitter, cable routing, shield grounding, load resistor, and receiving instrument. Sunstrand provides loop drawings with our instruments on request. Generic wiring diagrams for 2-wire and 4-wire configurations are included in Sections 4 and 5 of this guide.
Yes — install a precision resistor across the voltage input terminals of the receiving instrument: a 250Ω resistor converts 4-20mA to 1-5V; a 500Ω resistor converts 4-20mA to 2-10V. Use the formula V = I × R. Note that a 4mA “zero” produces 1V (not 0V), which is the expected live-zero offset. Ensure the resistor is precision-grade (0.1% tolerance) to maintain measurement accuracy.
Talk to a Sunstrand Application Engineer
Not sure which wiring configuration your process needs? Our engineers work with B2B buyers to specify the right transmitter and wiring topology for your exact application — at no extra cost.
Extend your knowledge with these guides from Sunstrand and our recommended reading:
Pressure Transmitter Selection Guide
How to choose between gauge, absolute, and differential pressure transmitters for your application.
4-20mA vs HART vs Fieldbus: Which Signal Standard Is Right for Your Plant?
A comparison of modern industrial signal standards for process engineers.
Coming Soon
How to Calibrate a Pressure Transmitter in the Field
Step-by-step zero and span calibration using a HART communicator and deadweight tester.
Coming Soon
Differential Pressure Transmitter Installation Guide
Impulse line layout, condensate pots, and manifold valve sequences for DP flow measurement.
This guide is for informational purposes. Always follow local electrical codes and transmitter manufacturer specifications during installation.